Studio tour
The Studio window, providers, the Loop, agent configuration, settings, multimodal input and shortcuts.
On this page
ADF Studio is the desktop application for creating, configuring, and operating ADF agents. It is the visual IDE for the Agent Document Format — where you author an agent, follow its turns, configure its tools, and run it on the mesh.
This document covers the Studio application itself: its interface, settings, and day-to-day workflows. For the underlying format, runtime, and tool concepts, see the documentation index, which links every guide. For the headless runtime, see the Daemon documentation.
Looking for a specific concept? Start at docs/index.md. This page is the app tour, not the full reference — it links into the guides rather than duplicating them.
Installation and Prerequisites
Before you begin you need:
- ADF Studio installed on your machine (macOS or Windows).
- At least one LLM provider — Studio supports Anthropic, OpenAI, OpenAI-compatible endpoints, and ChatGPT Subscription (OAuth).
On first launch Studio creates its application data directory (~/.adf-studio/), which holds settings, the shared sandbox-package store, and per-agent compute state.
Setting Up a Provider
You must configure a provider before an agent can run.
- Open Settings (gear icon in the sidebar, or
Cmd/Ctrl + ,). - Go to the Providers section.
- Click Add provider. A catalog opens with one tile per service, grouped as:
- Subscriptions — ChatGPT Plus/Pro and SuperGrok/X Premium, via OAuth sign-in (flat-rate, no API key).
- APIs — Anthropic, OpenAI, OpenRouter, Gemini, xAI, Mistral, Groq and the other hosted endpoints (API key).
- Local — LM Studio, Ollama, vLLM, llama.cpp and friends, with the usual localhost base URL prefilled.
- Other — any endpoint that speaks the OpenAI API, with a base URL you enter.
- Click a tile. The provider is created and its configure modal opens: enter the key or complete the OAuth sign-in, optionally set a default model, and Save.
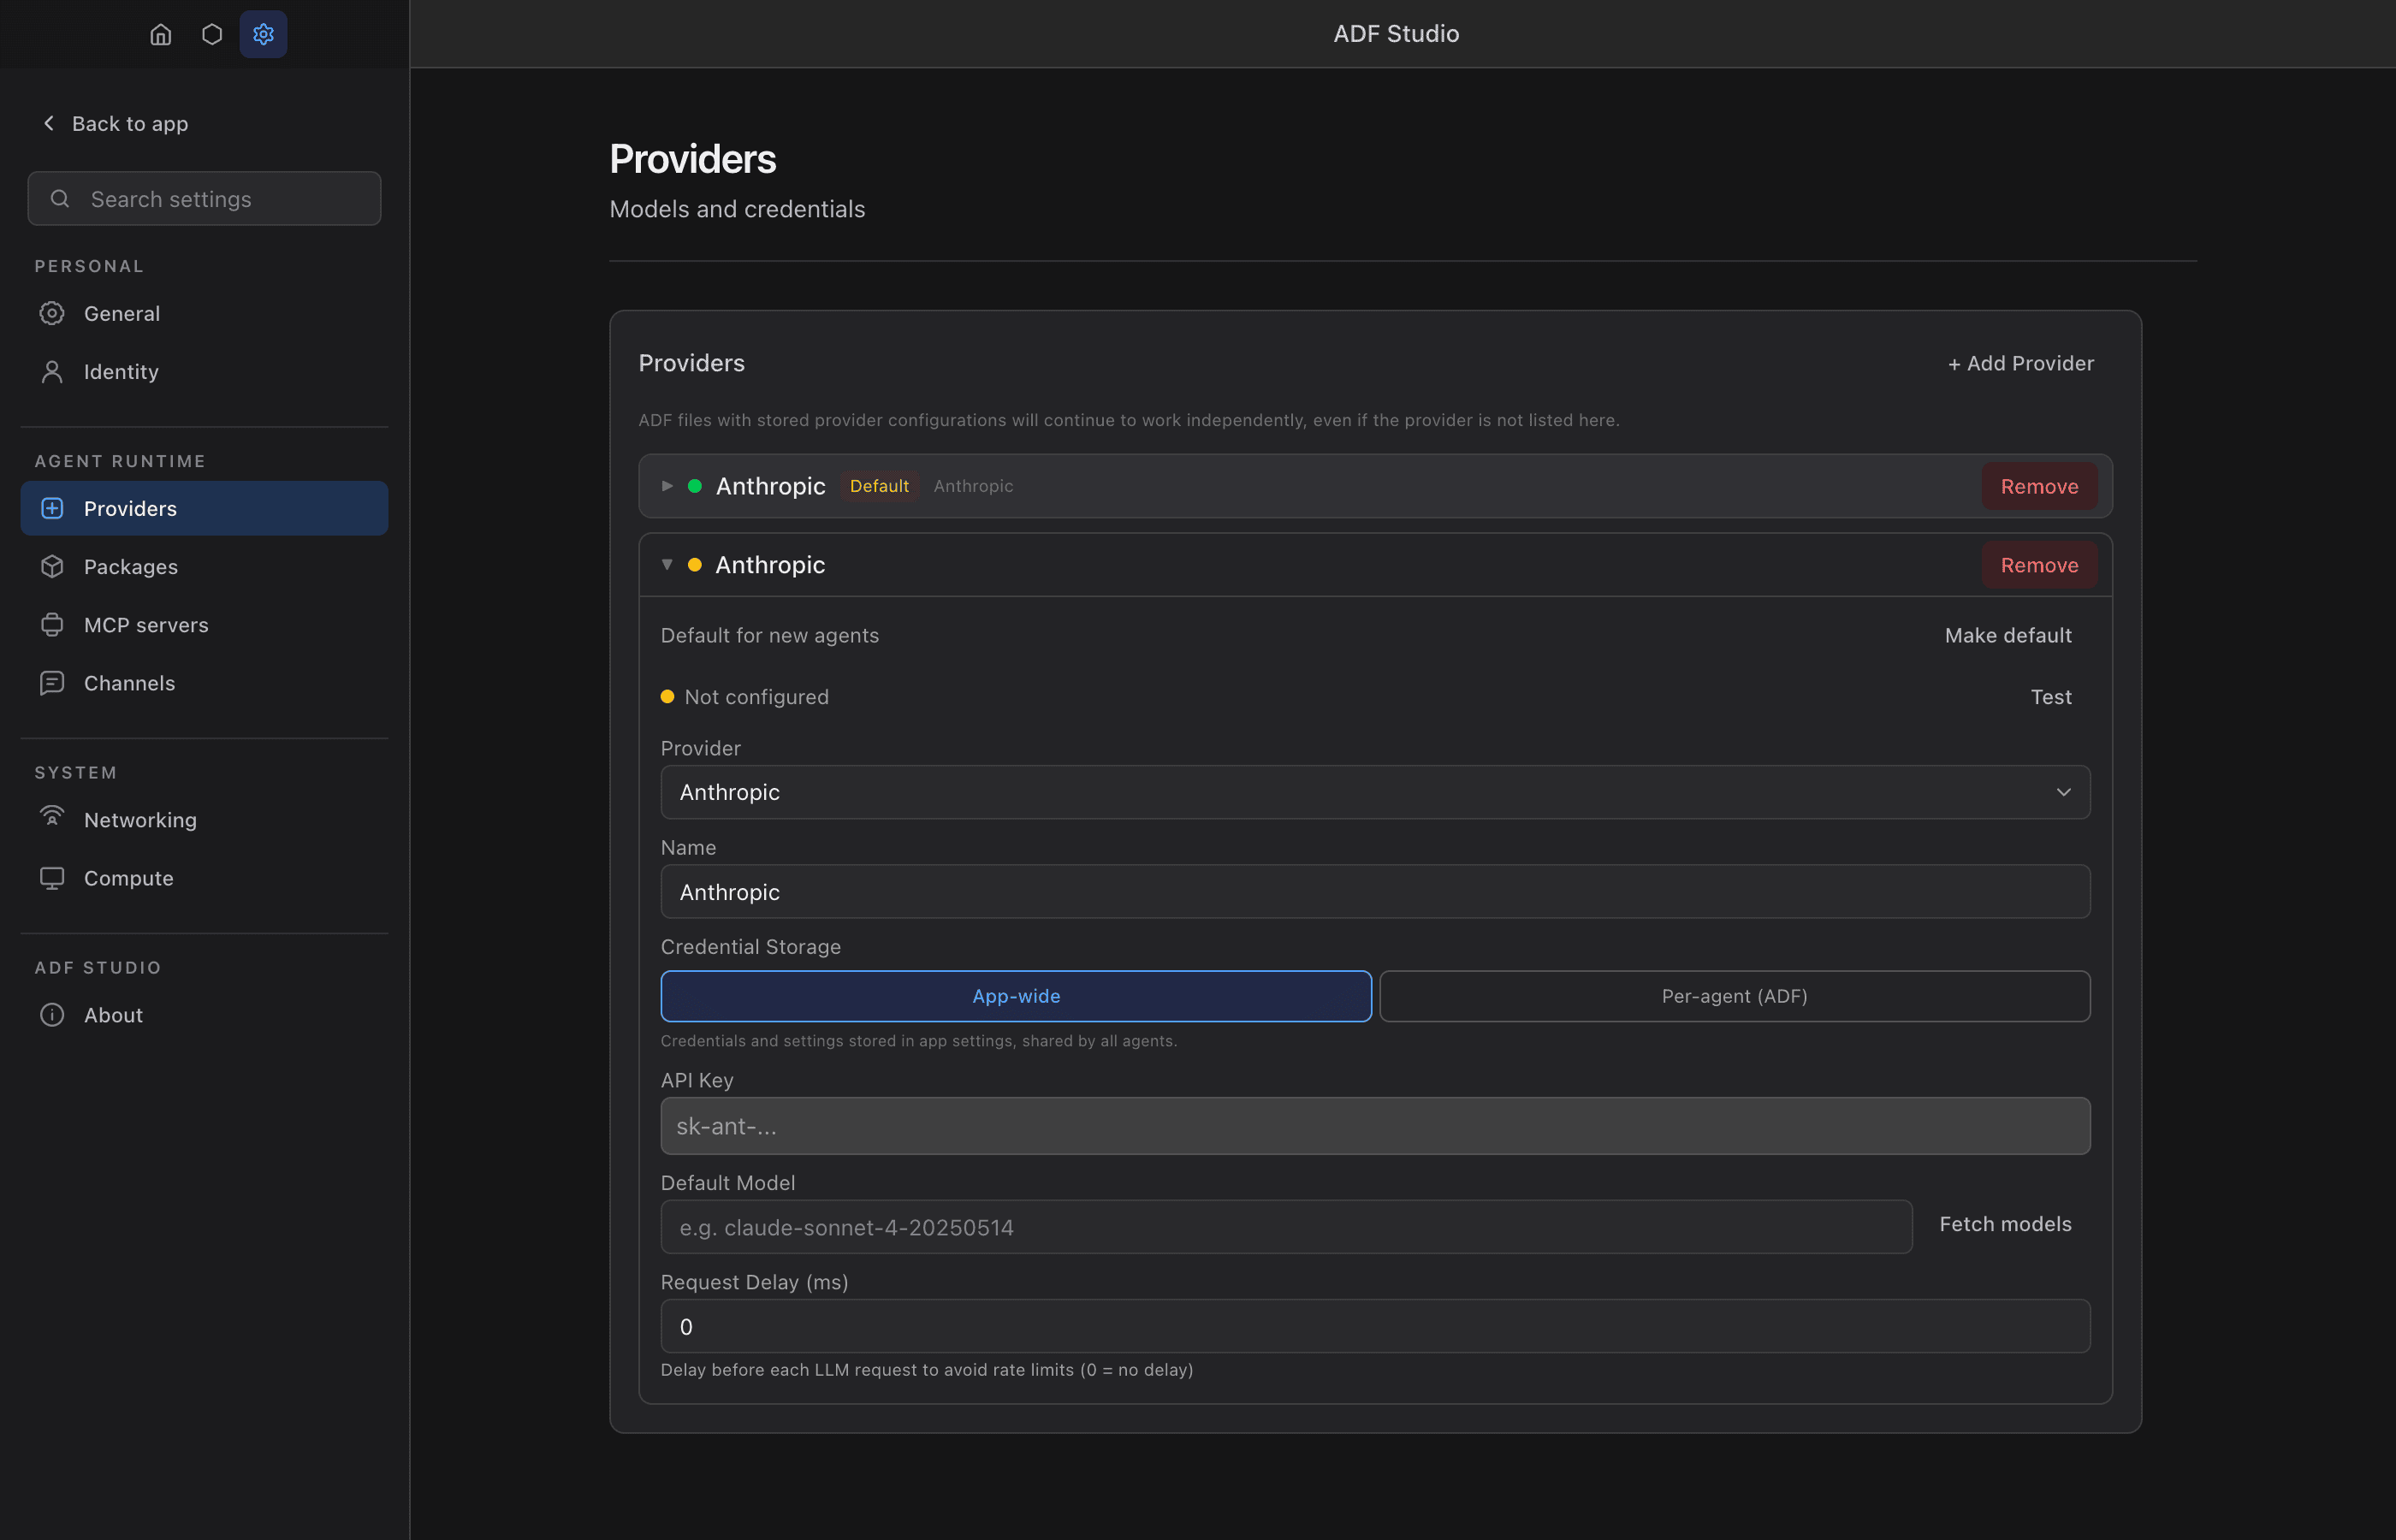
Provider keys are application-level and are never exposed to agent code execution — only server-side model invocation can use them. See Settings for the full provider reference.
Anatomy of the Interface
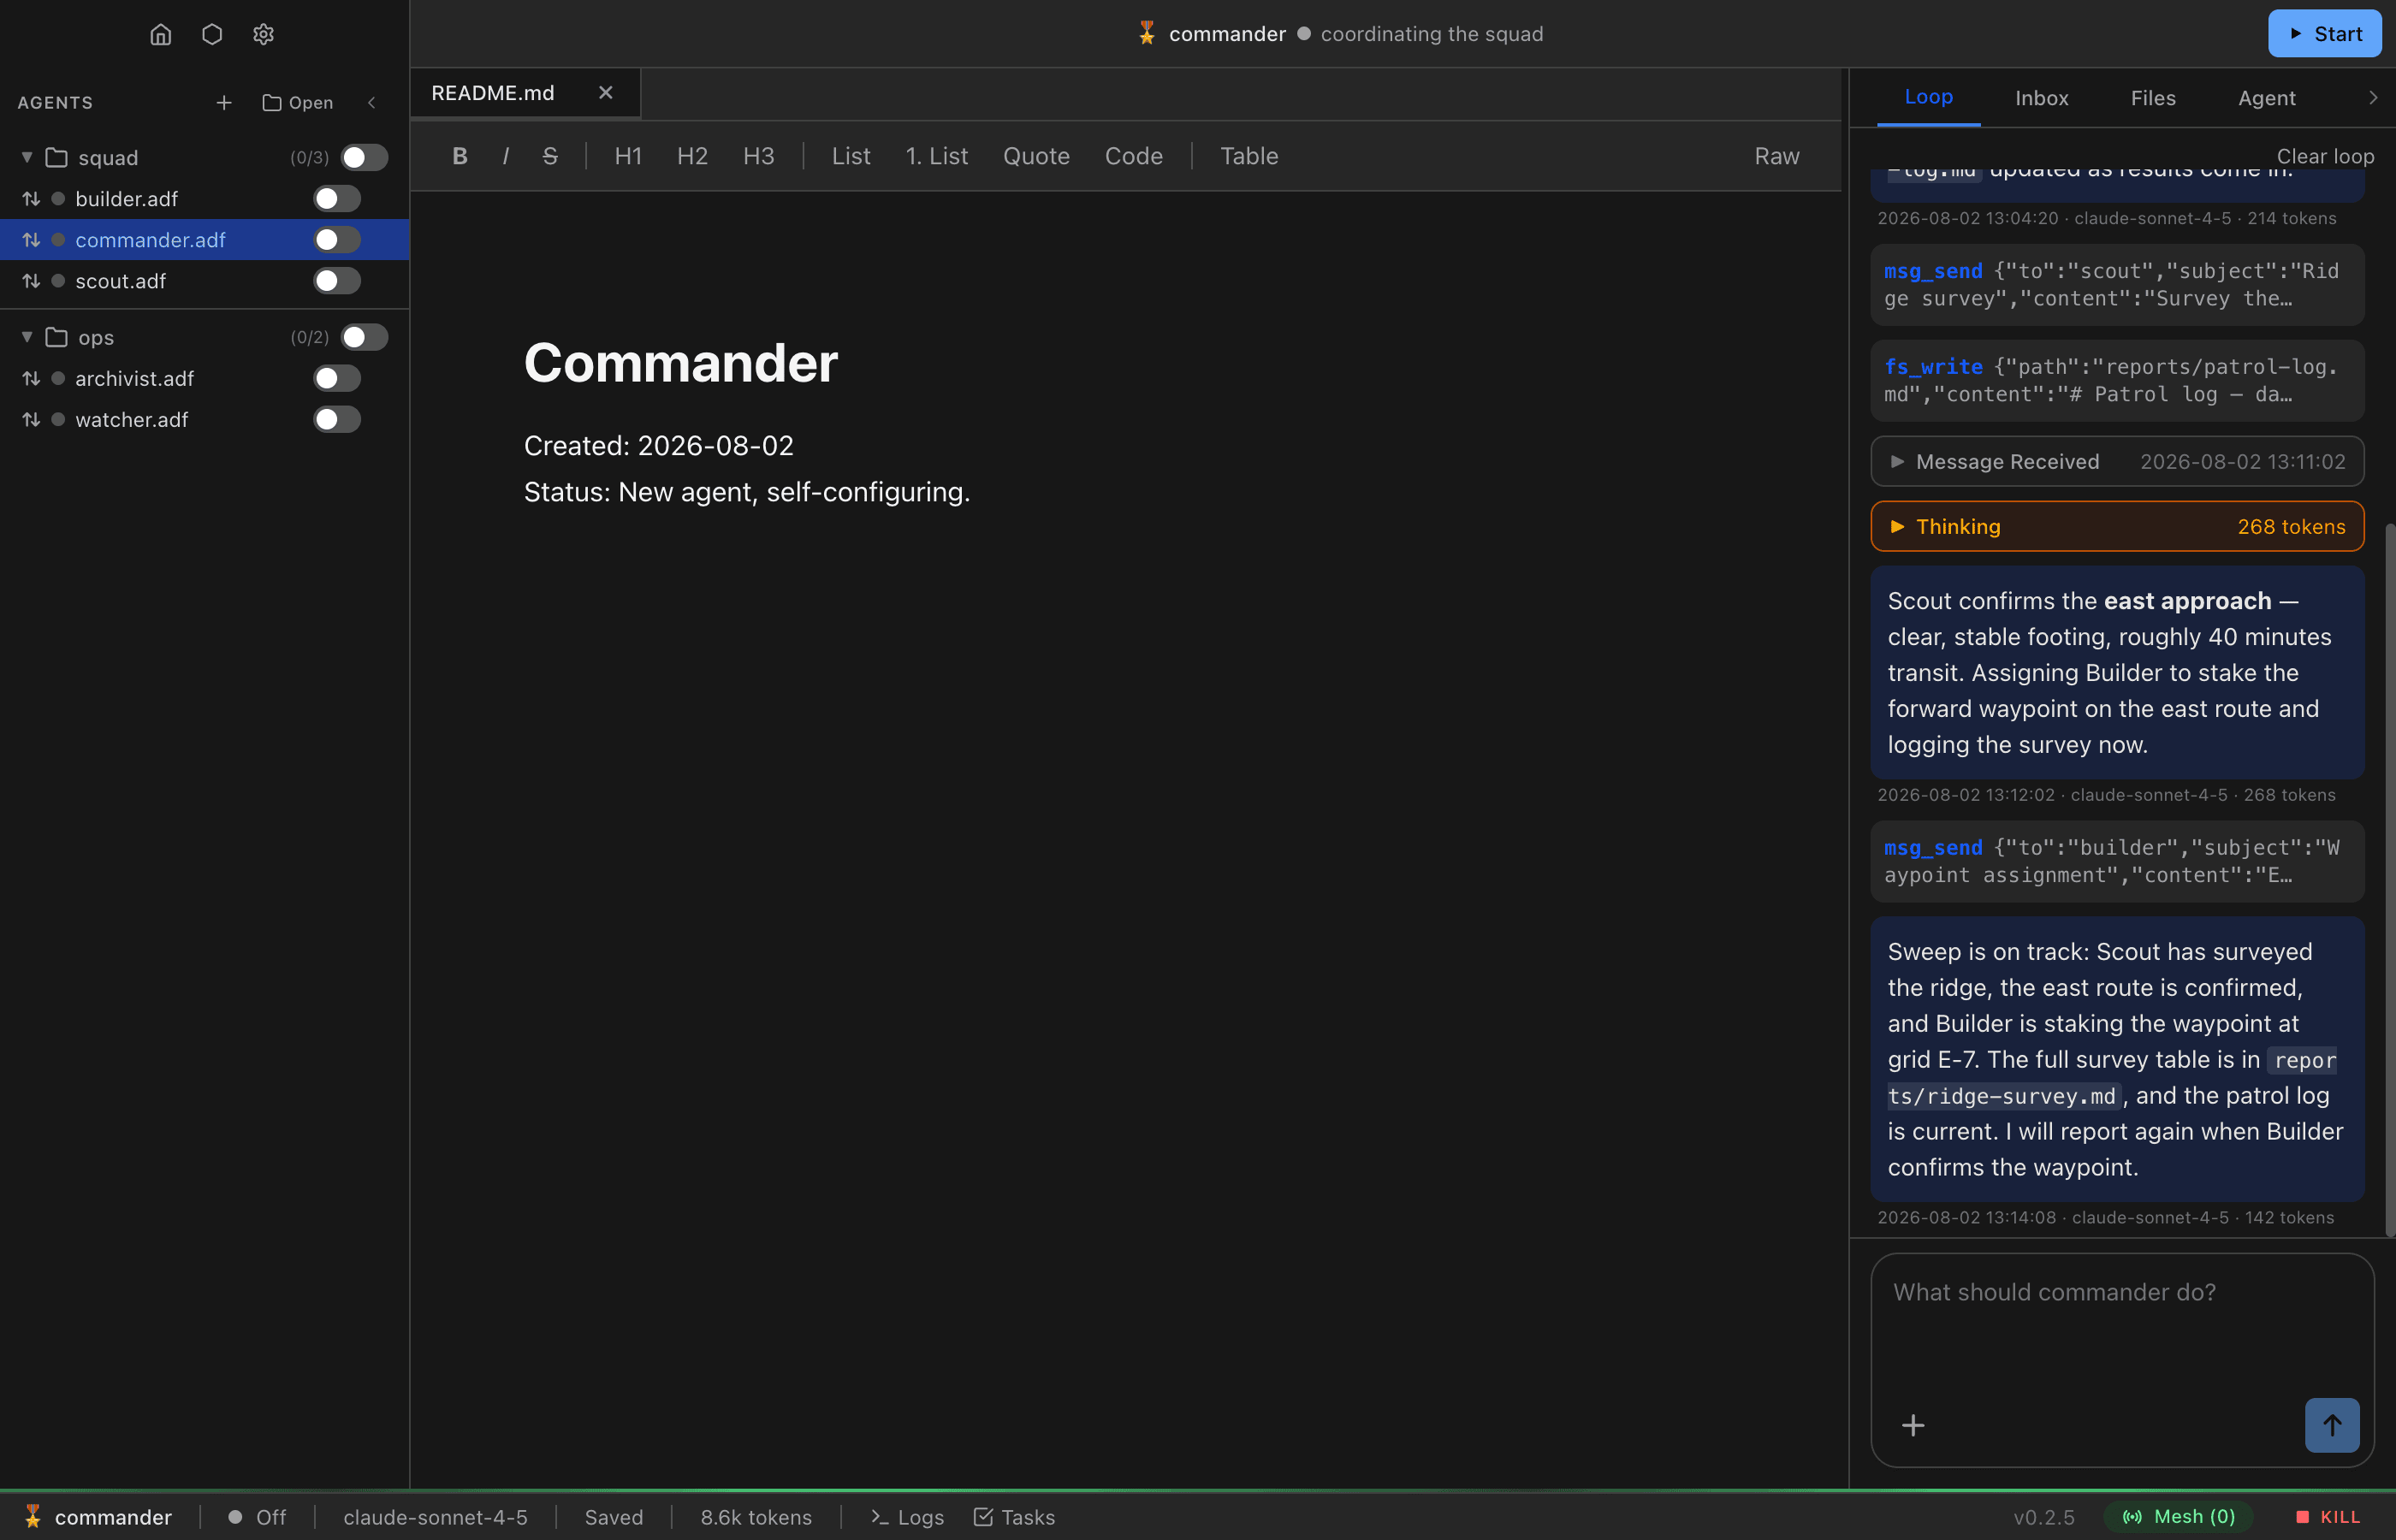
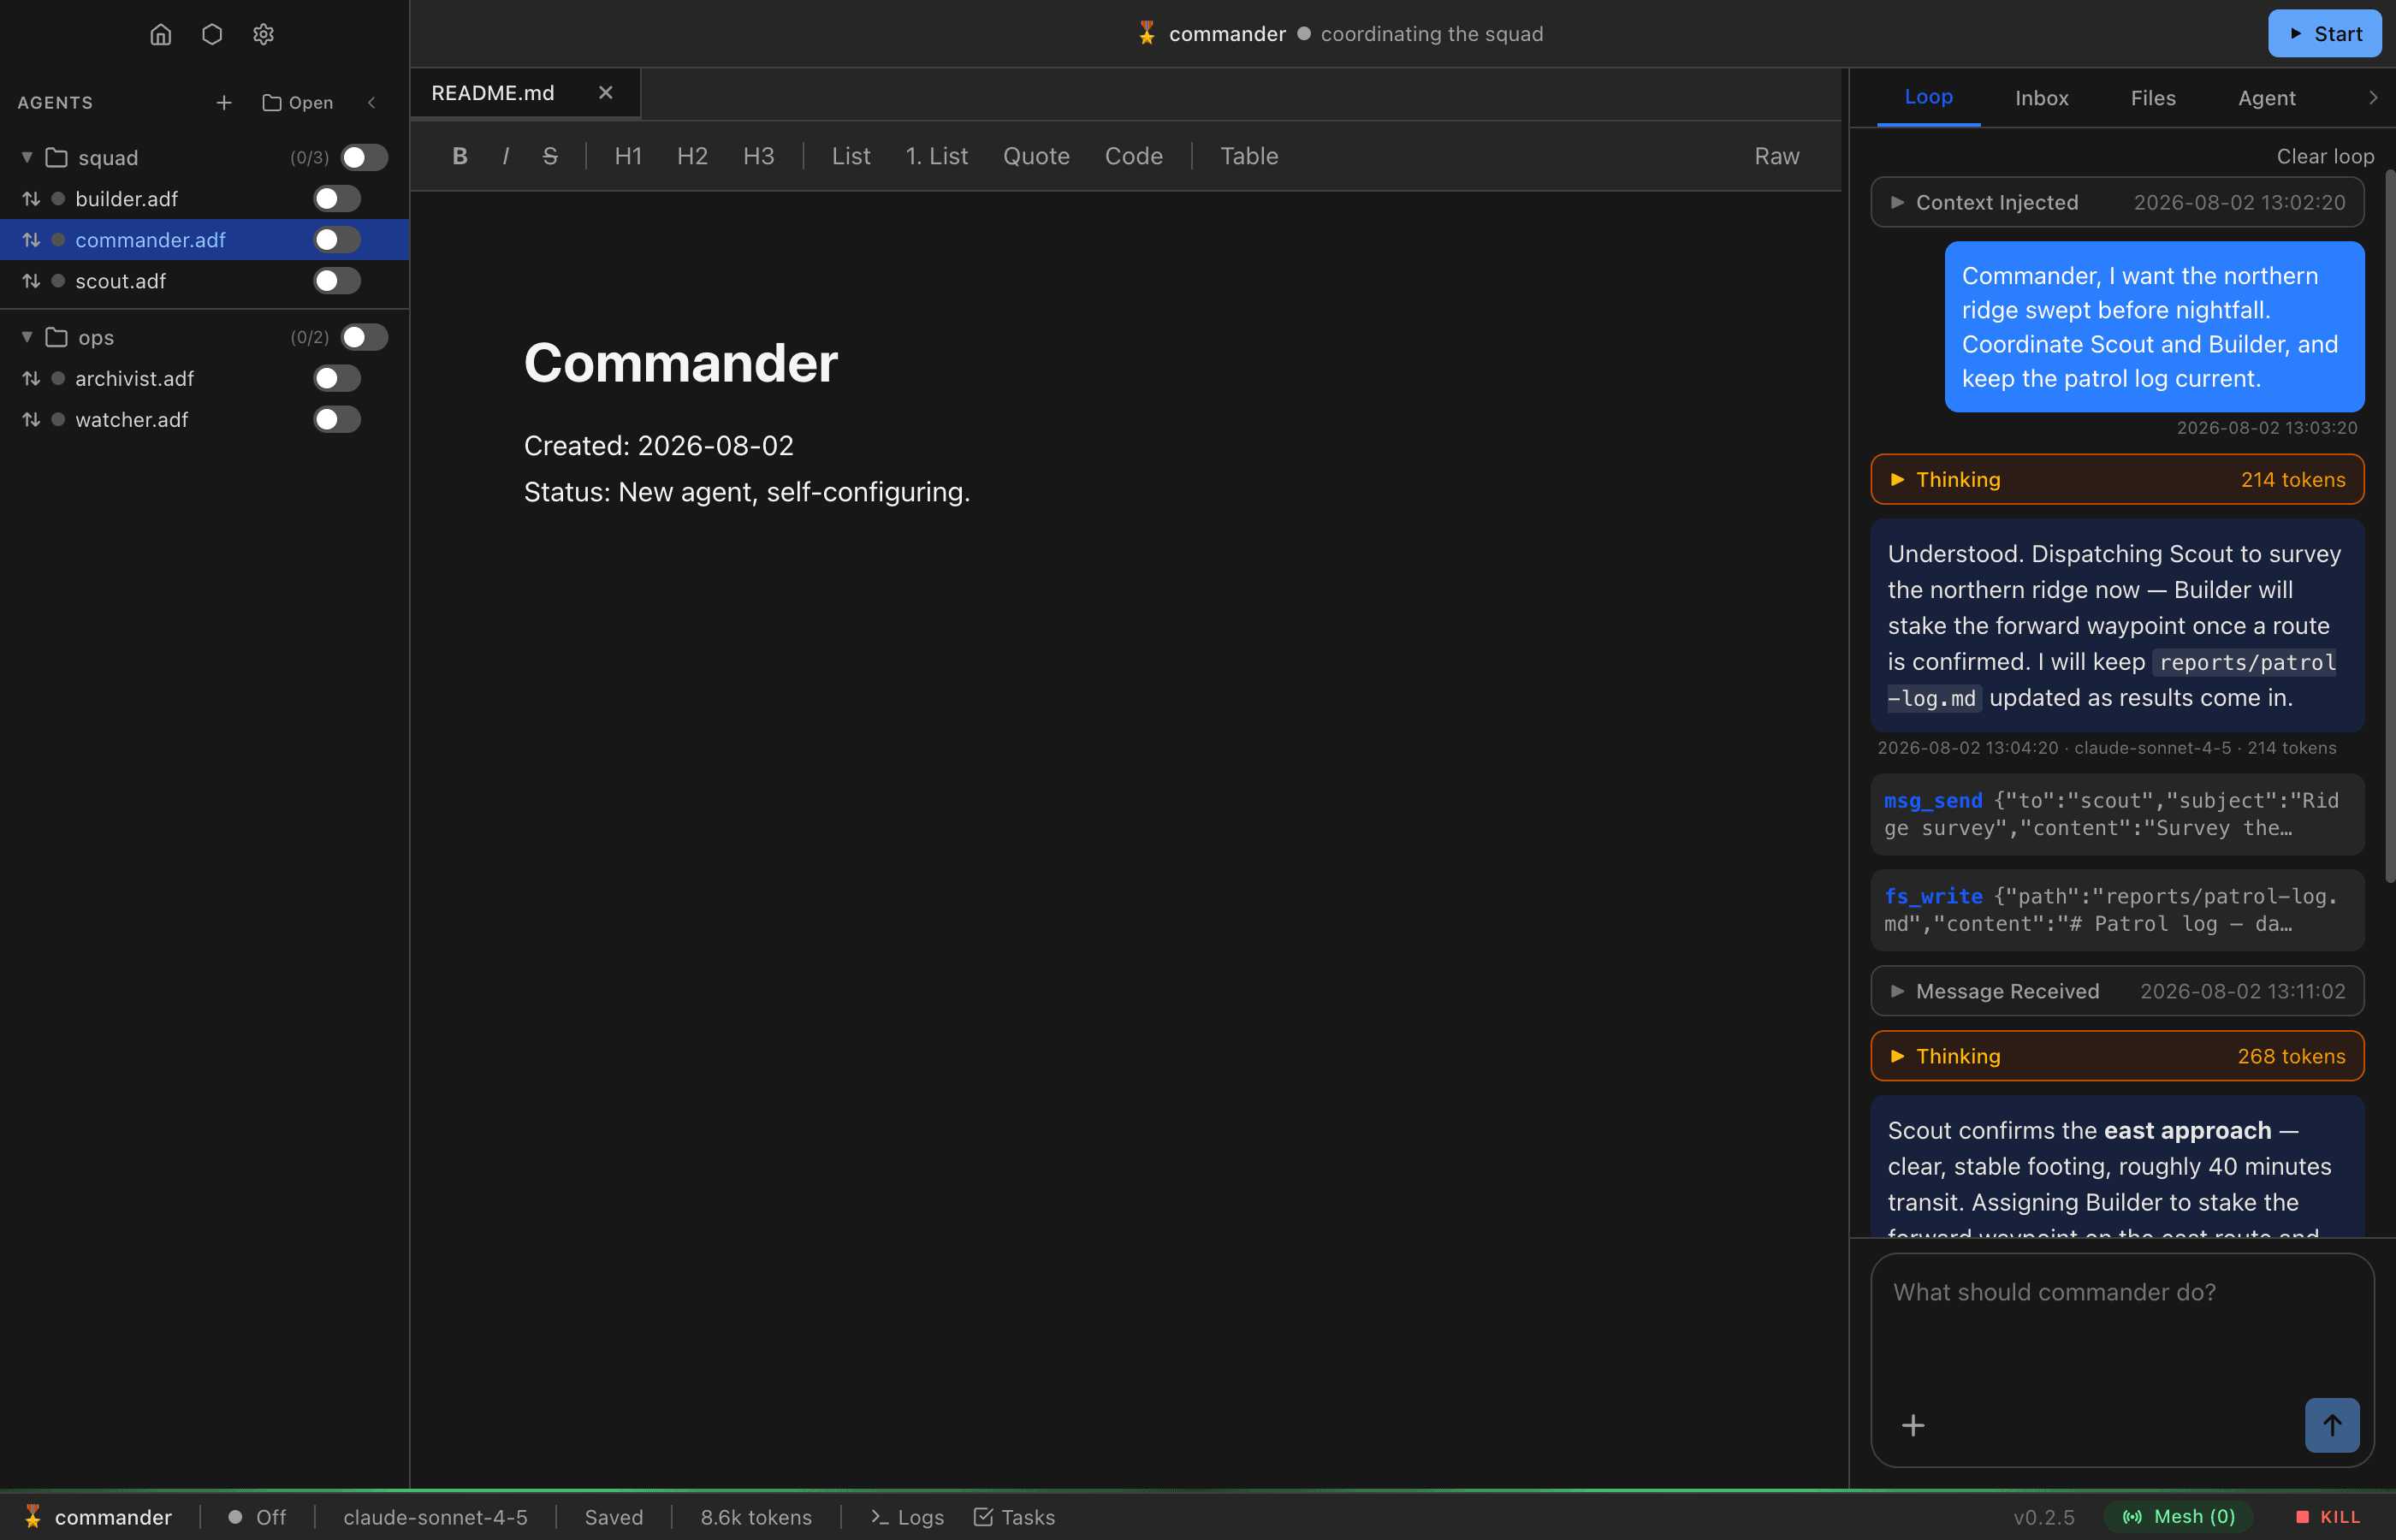
The Studio window is organized into a few persistent areas:
- Sidebar (left) — your open agents and their live status, plus quick actions (New .adf, open, Settings). Selecting an agent loads it into the main panel.
- Main panel (center) — the active tab for the selected agent.
- Right panel (collapsible) — additional context and configuration where applicable.
Per-agent tabs
| Tab | What it shows |
|---|---|
| Loop | The conversation/transcript: your messages, the agent’s reasoning, tool calls and results. This is where you chat with the agent. |
| Inbox | Messages received from other agents over the mesh. |
| Files | The agent’s files (adf_files): README.md, mind.md, soul.md, and any uploaded or agent-written files. |
| Agent | The configuration panel, with sub-sections for Identity, Model, Instructions, Tools, Triggers, Messaging, Serving, Timers, and the raw Config. (mind.md and soul.md are edited as files in the editor, not here.) |
The Home view
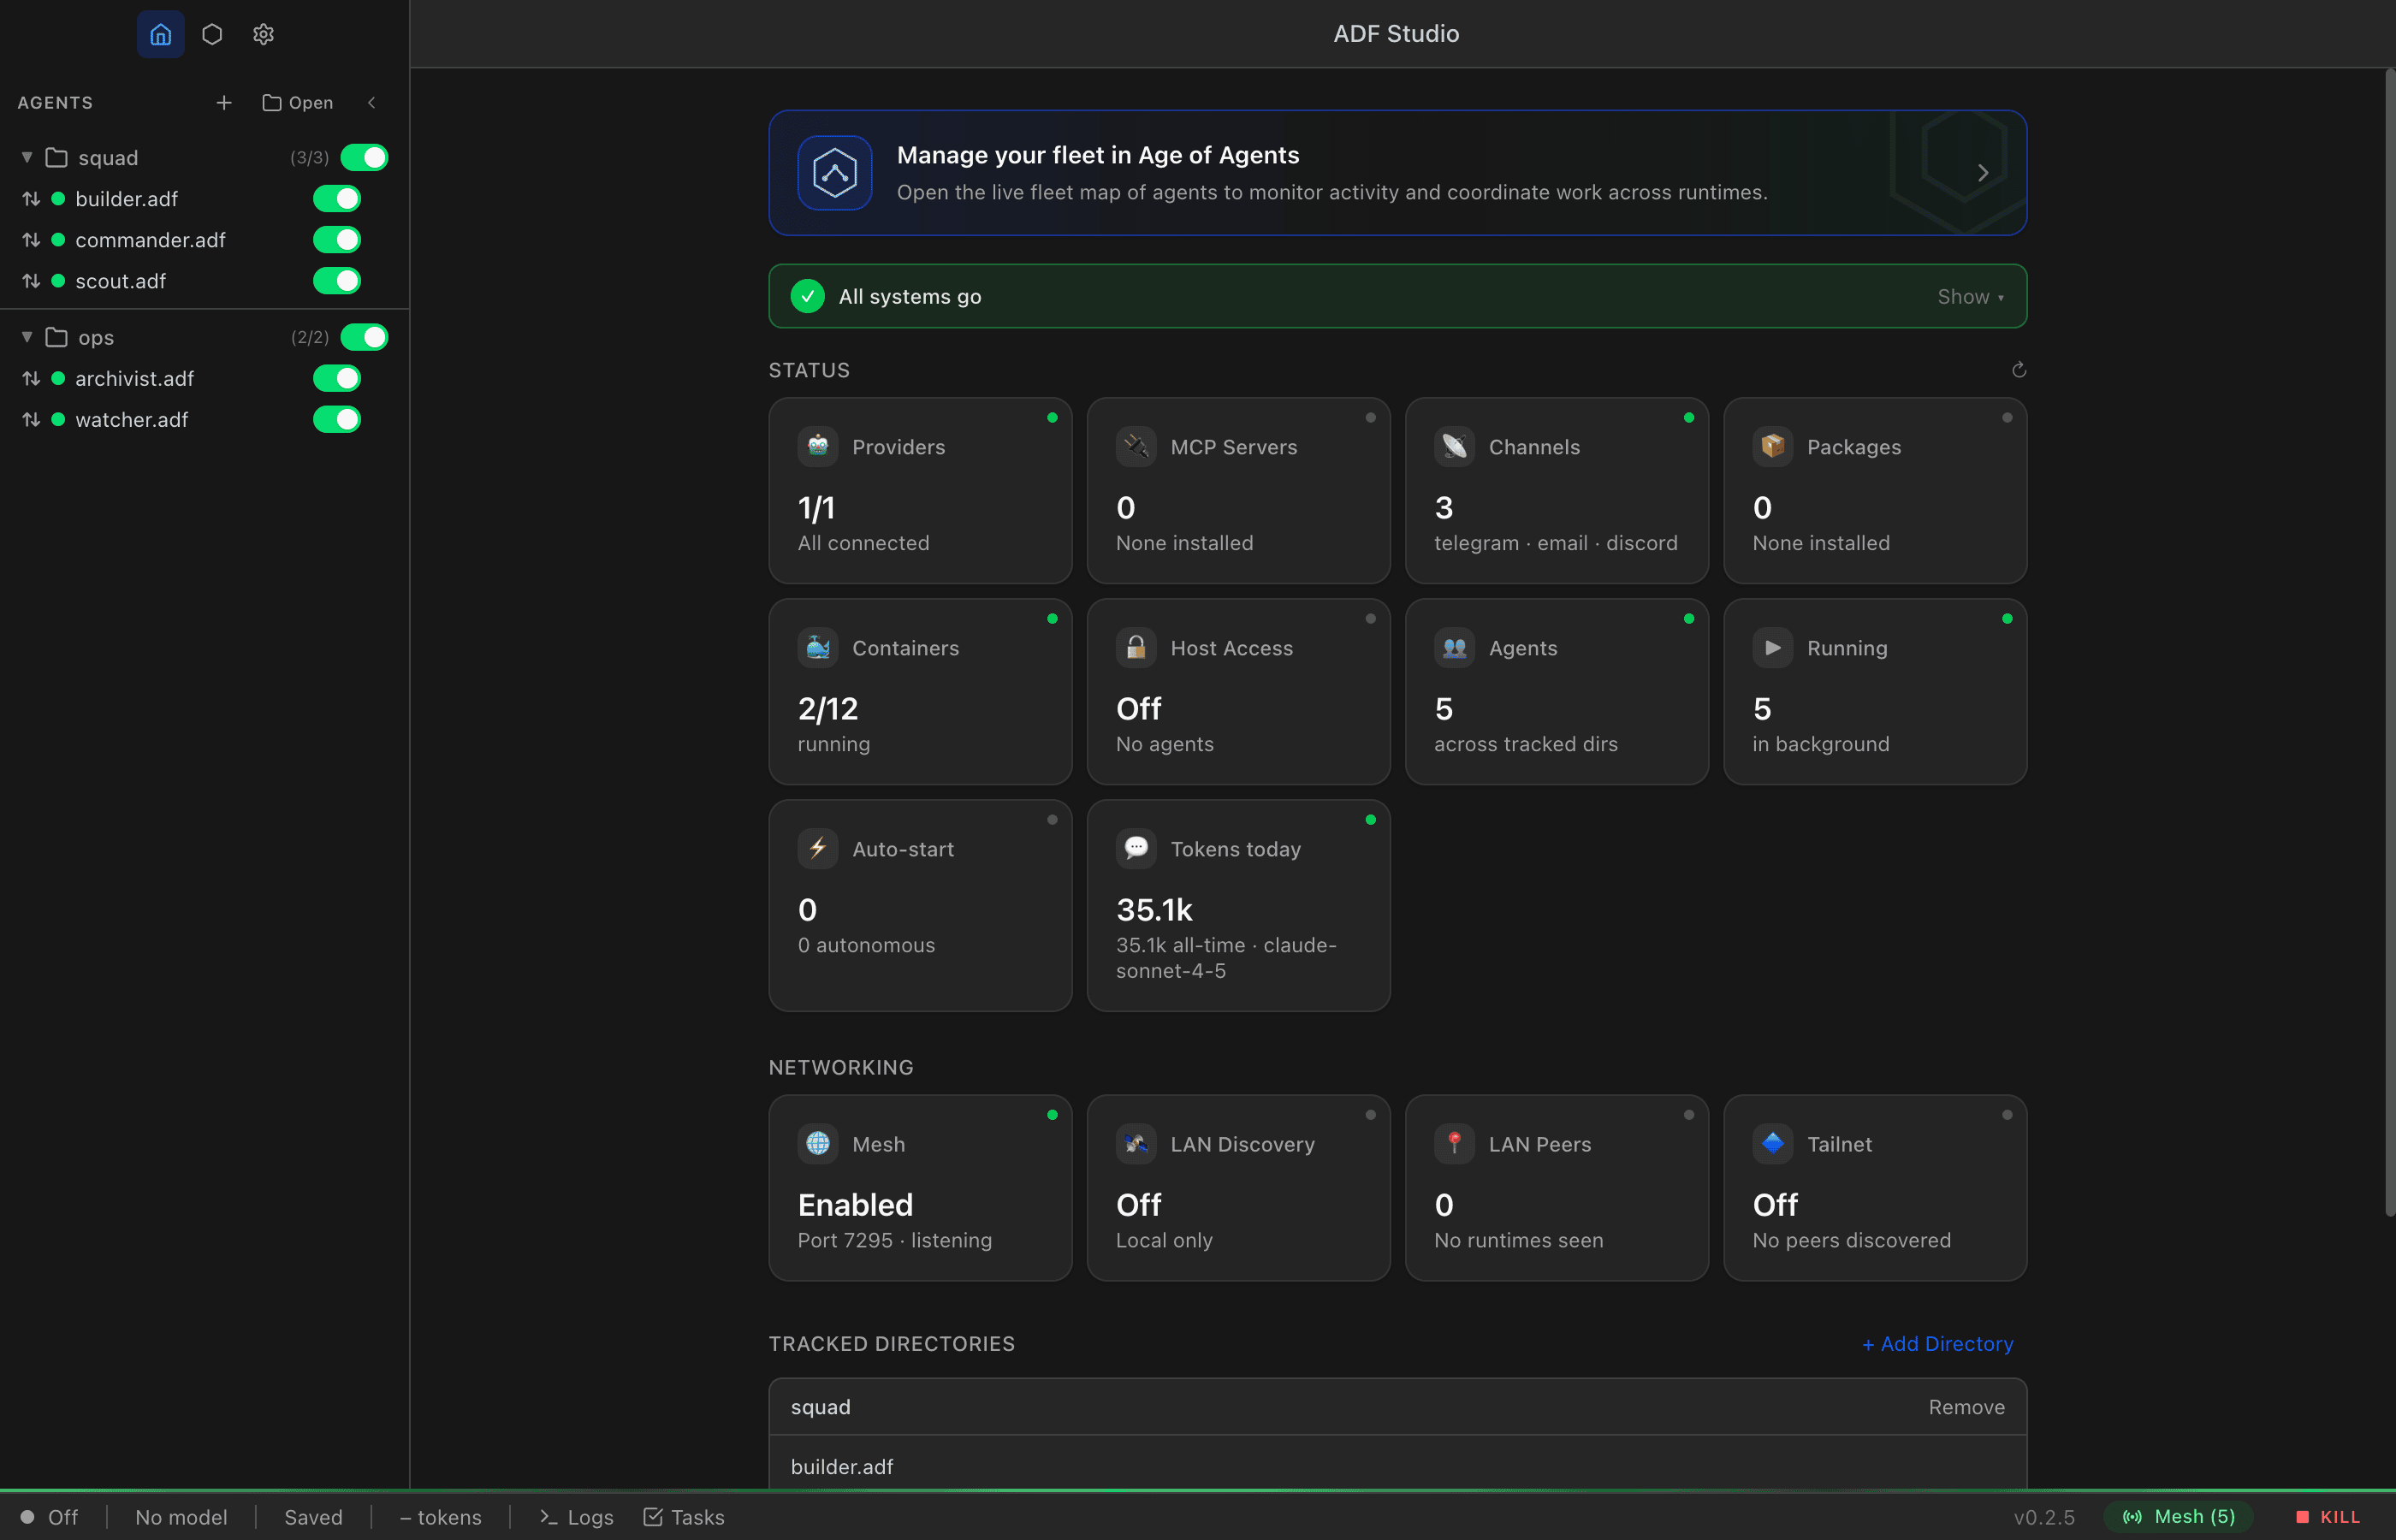
When no agent is selected, Studio shows a Home dashboard: a compact header plus a grid of status tiles (agents, messaging, compute/containers, and more) that load progressively and deep-link into the relevant Settings section when clicked. A Networking panel surfaces LAN discovery state. Container-backed tiles refresh on a short interval so they settle as services finish booting.
The fleet map
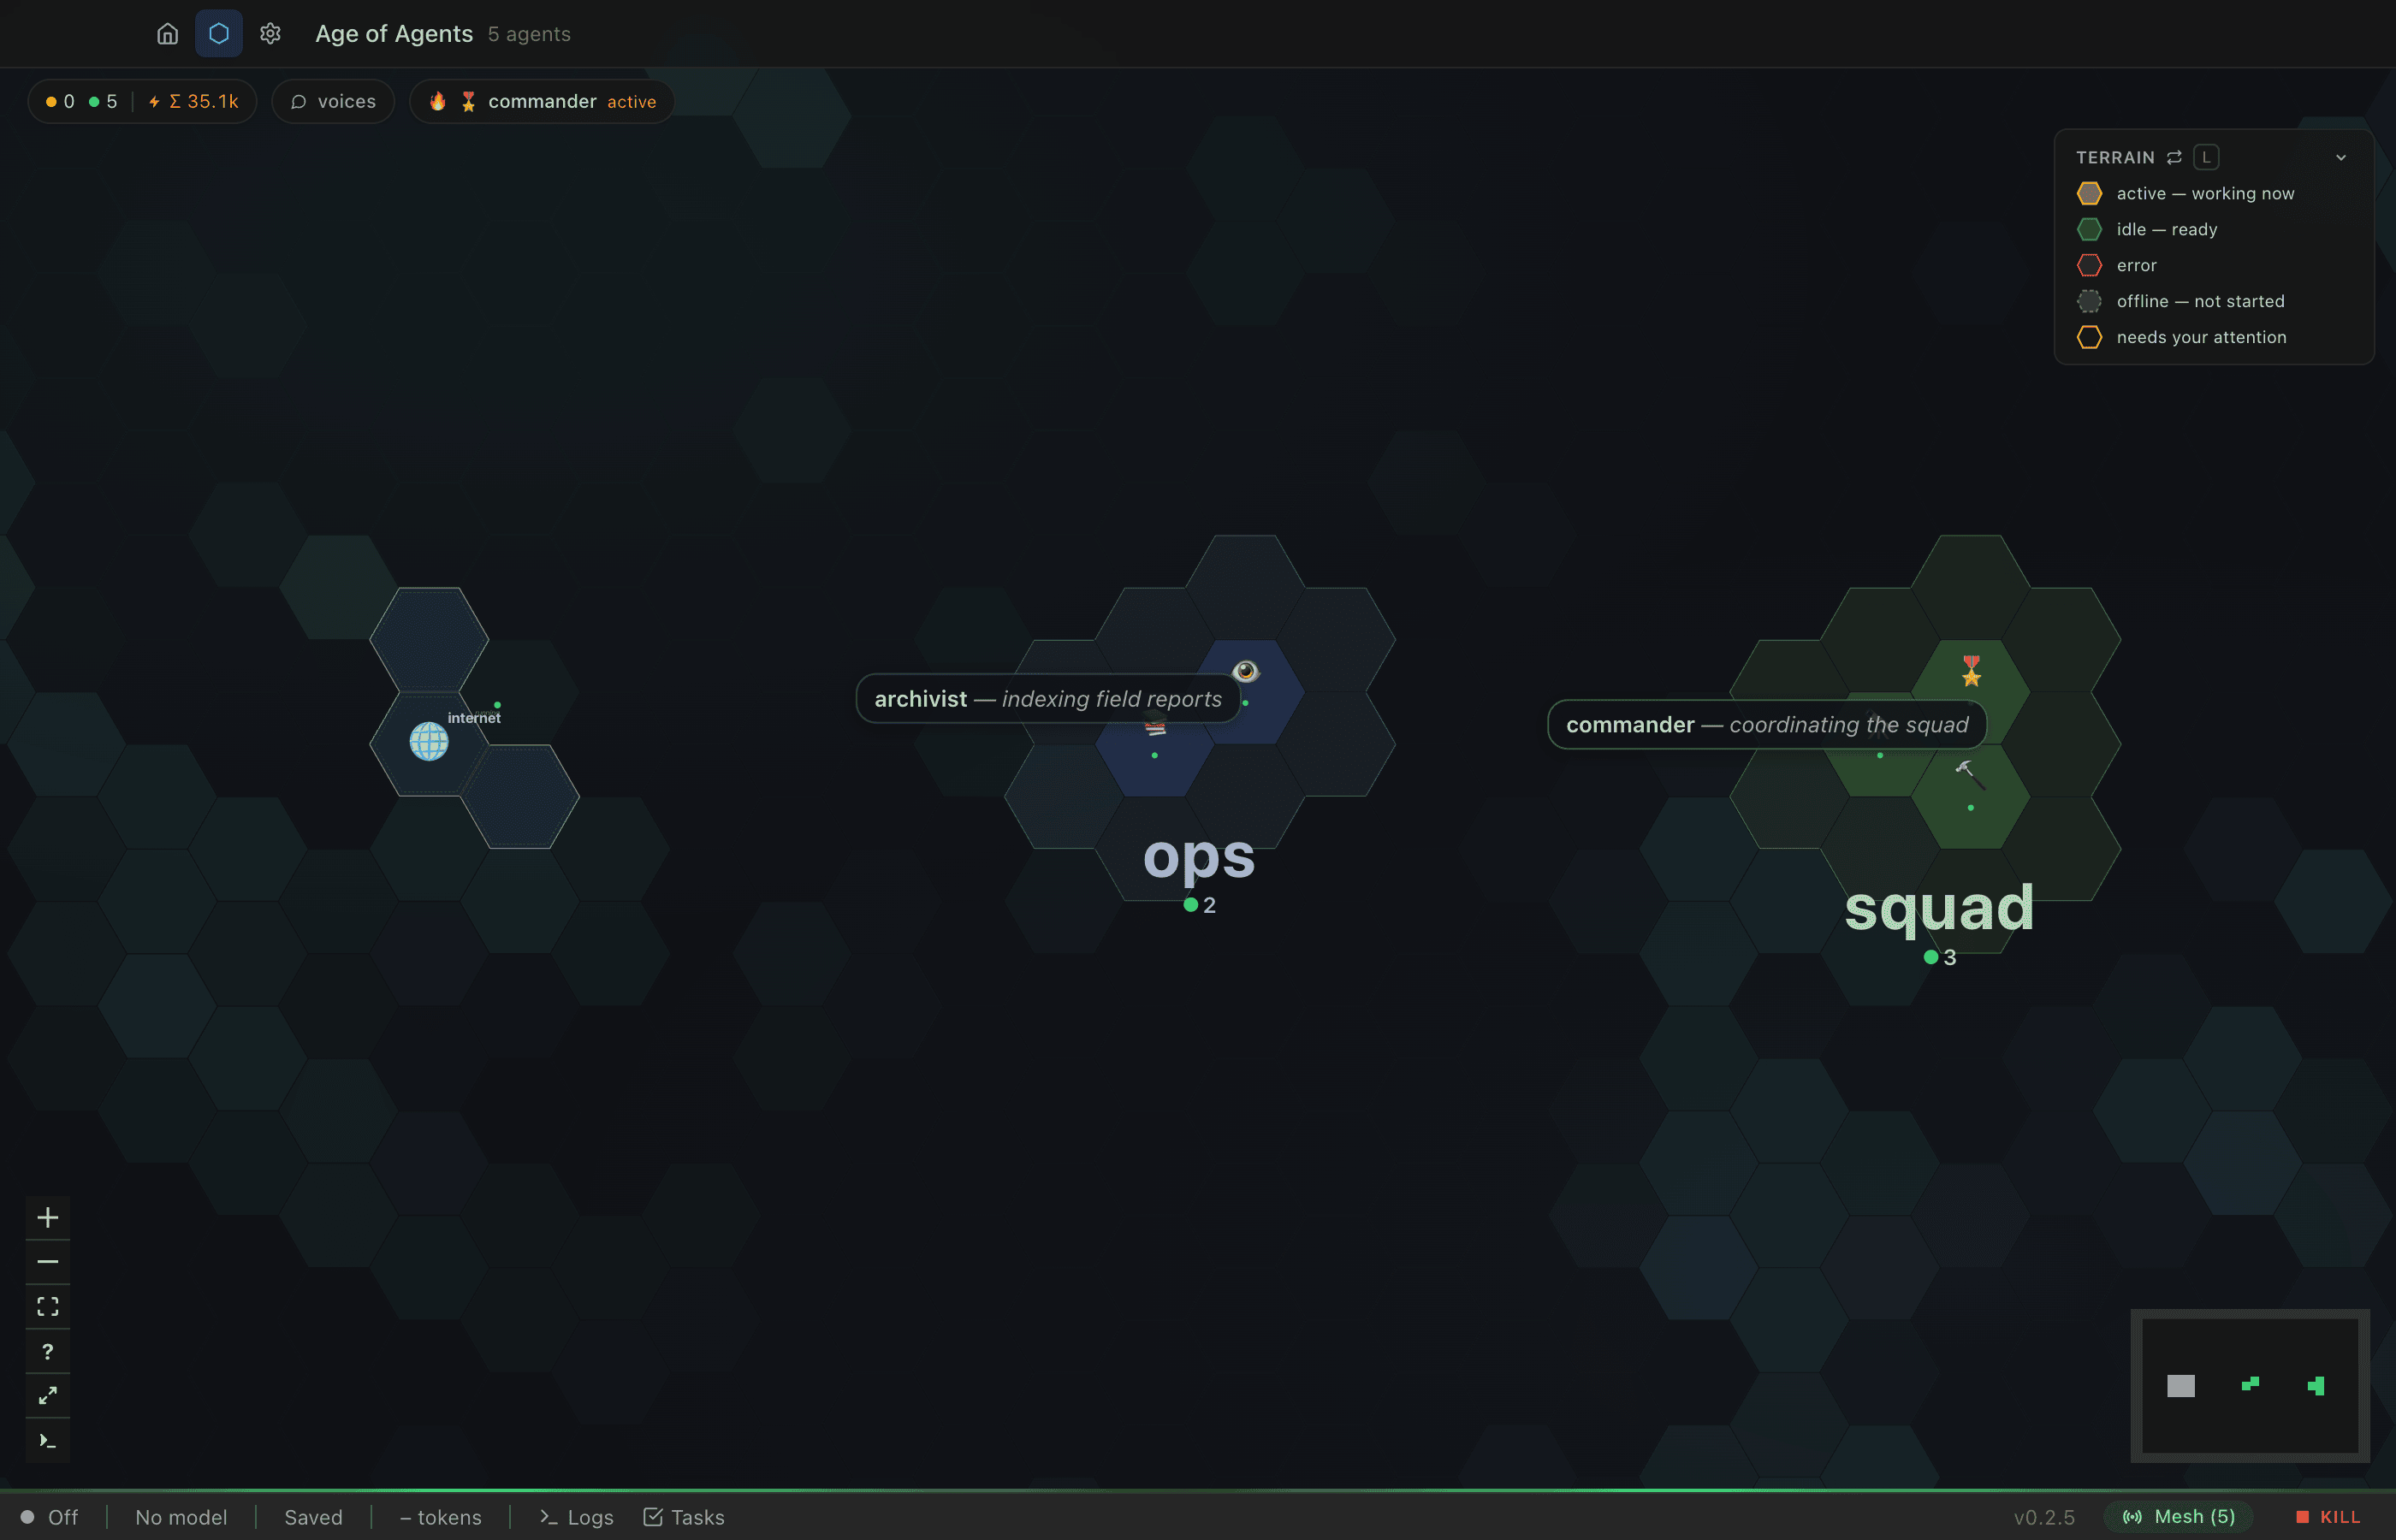
The Age of Agents button in the toolbar opens the fleet map — an RTS-style command surface where every agent is a tile on a hex-territory map, grouped by directory. From there you can select one or many agents, command them with hotkeys, rearrange the map’s geography, and handle pending approvals. See the Fleet Map guide.
Creating Your First Agent
- Click New .adf in the sidebar.
- Choose a filename — this becomes the agent’s default name.
- Studio creates the
.adffile in your tracked directory from an agent template.
A new agent gets everything in its template except the template’s identity and history, including its start state, files and tool set. It gets a new 12-character config id and its own identity. Fields the template does not set take the new-file defaults.
See Creating and Configuring Agents for every configuration field.
Talking to Your Agent
- Select the agent in the sidebar and open the Loop tab.
- Type a message in the input at the bottom and press Enter.
Sending a message drives the lifecycle:
- The agent transitions from idle to active.
- Its model processes your message alongside its instructions, document, and available tools.
- It responds, possibly calling tools along the way — each call and result is shown inline in the Loop.
- It returns to idle.
See Agent States and Lifecycle for the full state model (active, idle, hibernate, suspended, off) and Memory Management for how the Loop is compacted and archived over time.
Configuring an Agent
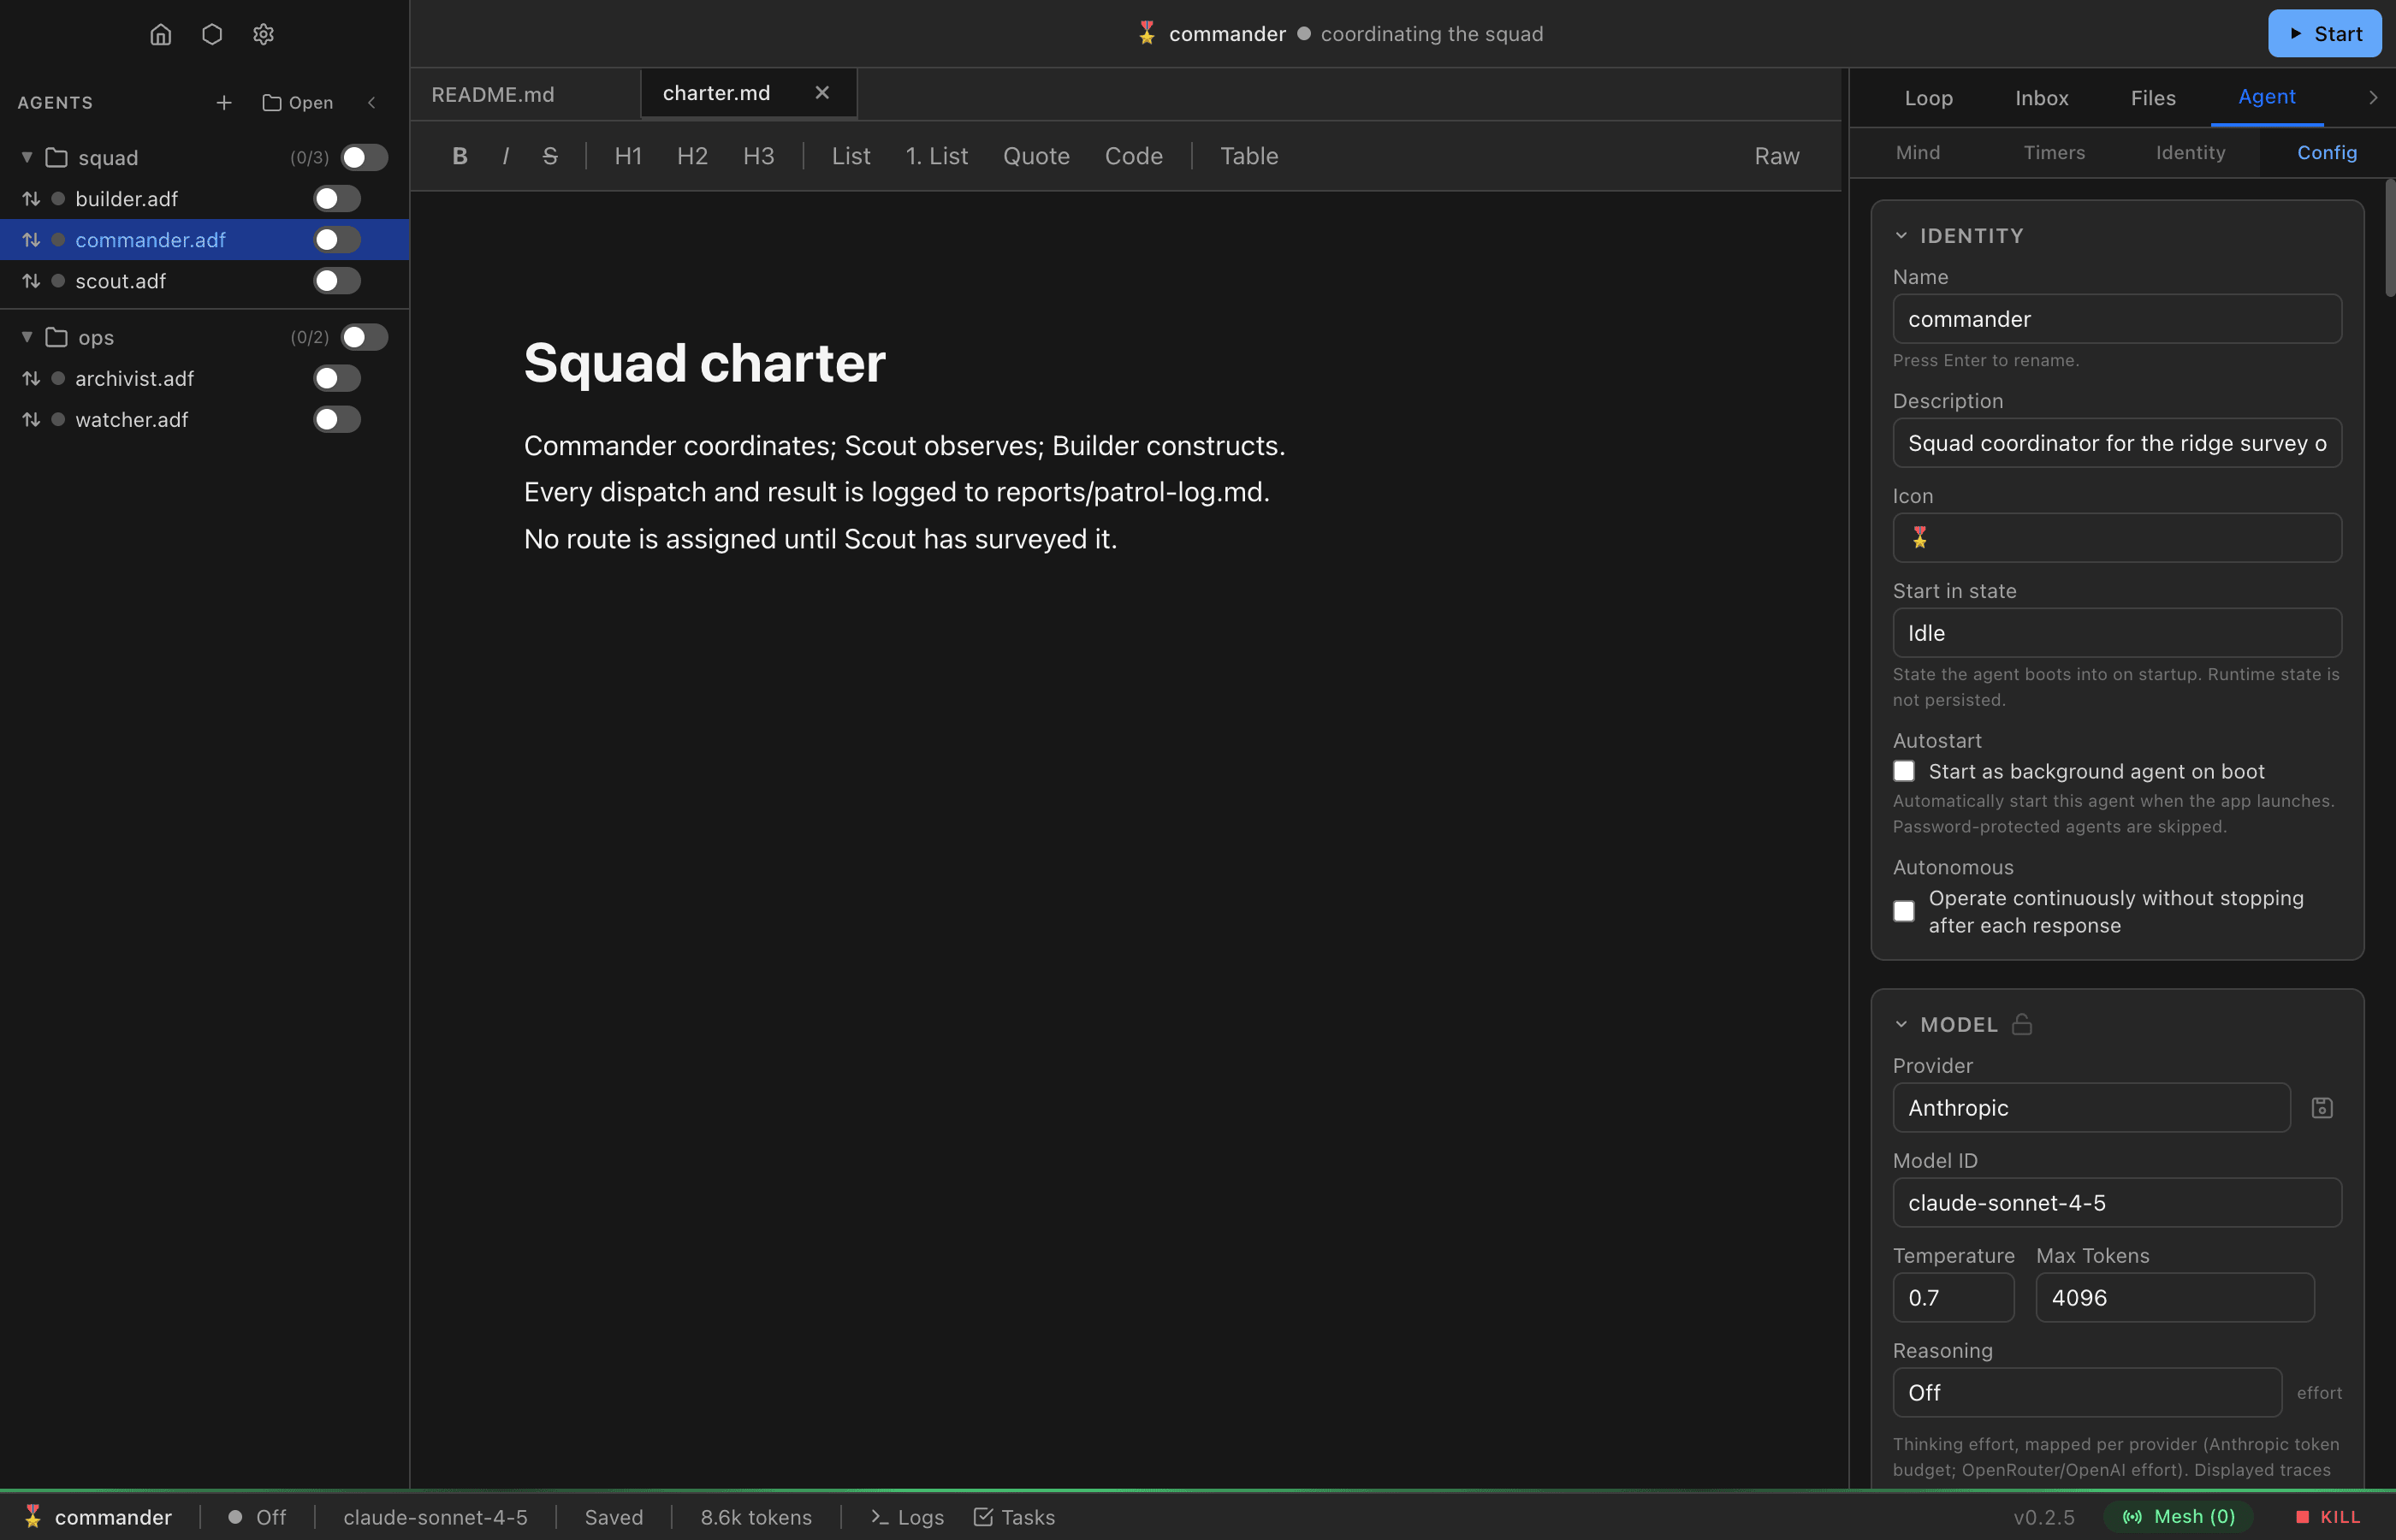
Open the Agent tab to configure the selected agent. The main areas:
- Identity — name, description, icon, and the agent ID/DID.
- Model — provider, model ID, temperature, max tokens, thinking budget, and provider parameters.
- Instructions — the system prompt (immutable by the agent itself).
- Tools — which built-in tools are enabled and visible, and which are restricted/locked. See Tools.
- Triggers — what events wake the agent. See Triggers.
- Messaging — channels and inter-agent routing. See Messaging.
- Serving — HTTP routes, shared files, and WebSocket endpoints. See HTTP Serving.
Every field is documented in Creating and Configuring Agents.
Settings
Settings (gear icon, or Cmd/Ctrl + ,) holds application-wide and instance-wide configuration:
- Providers — LLM provider accounts and default models.
- Packages — runtime sandbox packages available to every agent on this instance, installed to the shared store at
~/.adf-studio/sandbox-packages/. Agents can also promote their own packages here via Make Runtime. See Code Execution. - MCP — the MCP Status Dashboard for registered tool servers and their credentials. See MCP Integration.
- Computer tab — each desktop-enabled isolated agent has a small standard Linux desktop (Openbox, tint2, PCManFM) with one ADF-managed Chromium session that opens on demand. Studio streams it through noVNC, browser MCP automation controls Chromium through CDP, and
xdotool/scrotgive agents generic computer use. See Computer. - Networking — LAN discovery (mDNS) state and discovered runtimes. See LAN Discovery.
- Web — settings for serving agent content over HTTP. See HTTP Serving.
- About / Updates — version and update information.
The complete reference is in Settings.
Multimodal
Studio agents can perceive images, audio, and video when the matching modality is enabled in the agent’s model.multimodal configuration. When enabled, media returned by fs_read or MCP tools is sent to the model as a native content block (rather than just a path reference); when disabled, the file is still saved to adf_files and the tool result includes a path reference, but no content block is created.
| Modality | Config flag | Content block | Supported formats | Default size limit (limits.*) |
|---|---|---|---|---|
| Image | multimodal.image | image_url | PNG, JPEG, GIF, WEBP | max_image_size_bytes (5 MB) |
| Audio | multimodal.audio | input_audio | WAV, MP3, OGG, FLAC, AAC, AIFF, M4A, WebM | max_audio_size_bytes (10 MB) |
| Video | multimodal.video | video_url | MP4, MPEG, QuickTime, WebM | max_video_size_bytes (20 MB) |
Notes:
- Image replaces the legacy
model.visiontoggle. - Audio — the AI SDK natively supports only WAV and MP3; other formats are coerced to WAV for the SDK’s validator while actual codec negotiation happens provider-side.
- Video — the AI SDK has no native video support, so the runtime injects raw OpenAI-format
video_urlparts directly into the request body. This works for providers that accept the OpenAI chat-completions format (OpenRouter, Gemini, etc.). - Media content blocks are ephemeral — they are not persisted to
adf_loop. - In code/shell execution, the full structured JSON (with raw base64 data) is always returned regardless of these settings, so agents can parse, transform, save (
fs_write), or forward media programmatically. See The adf Proxy Object and Tools.
Keyboard Shortcuts
| Shortcut | Action |
|---|---|
Cmd/Ctrl + , | Open Settings |
Cmd/Ctrl + S | Save the current editor tab |
Cmd/Ctrl + W | Close the active editor tab |
Where to Go Next
- Getting Started — create your first agent and start a conversation.
- Core Concepts — one file, one agent; the access boundary; the ADF stack.
- Documentation index — the full list of guides for the format, runtime, tools, messaging, security, and more.
- Daemon documentation — run the same
.adfagents headlessly via the API runtime.